EXPL123 - Course Title Goes Here
Module x.x - The IRENE Method
Throughout this module, you may use the on-screen arrows to navigate between sections. When you are ready to begin, click on the "begin" button below.
EXPL123 - Course Title Goes Here
Module x.x - The IRENE Method
Background
Over the past several years, many instructional videos on space-saving or neater ways to fold laundry have been popularized on social media. One such method is known as the IRENE method, used primarily for folding shirts. This method not only prioritizes space-saving and neatness, but comes with the added benefit of stability. That is, the shirt will not un-fold itself under most circumstances, such as falling over in your drawer or as it moves in your luggage during travel.
In this module, we'll go through the basic procedure on how to fold most shirts using the IRENE method.
Learning Objectives
Given a standard short-sleeve (T-shirt) or long-sleeve shirt, you should be able to fold the shirt using the IRENE method. The shirt must resemble a uniform rectangle as it does at the end of the demonstration, must not un-fold when lightly tossed or flipped, and the entire folding procedure must be completed in under 40 seconds.
What You'll Need
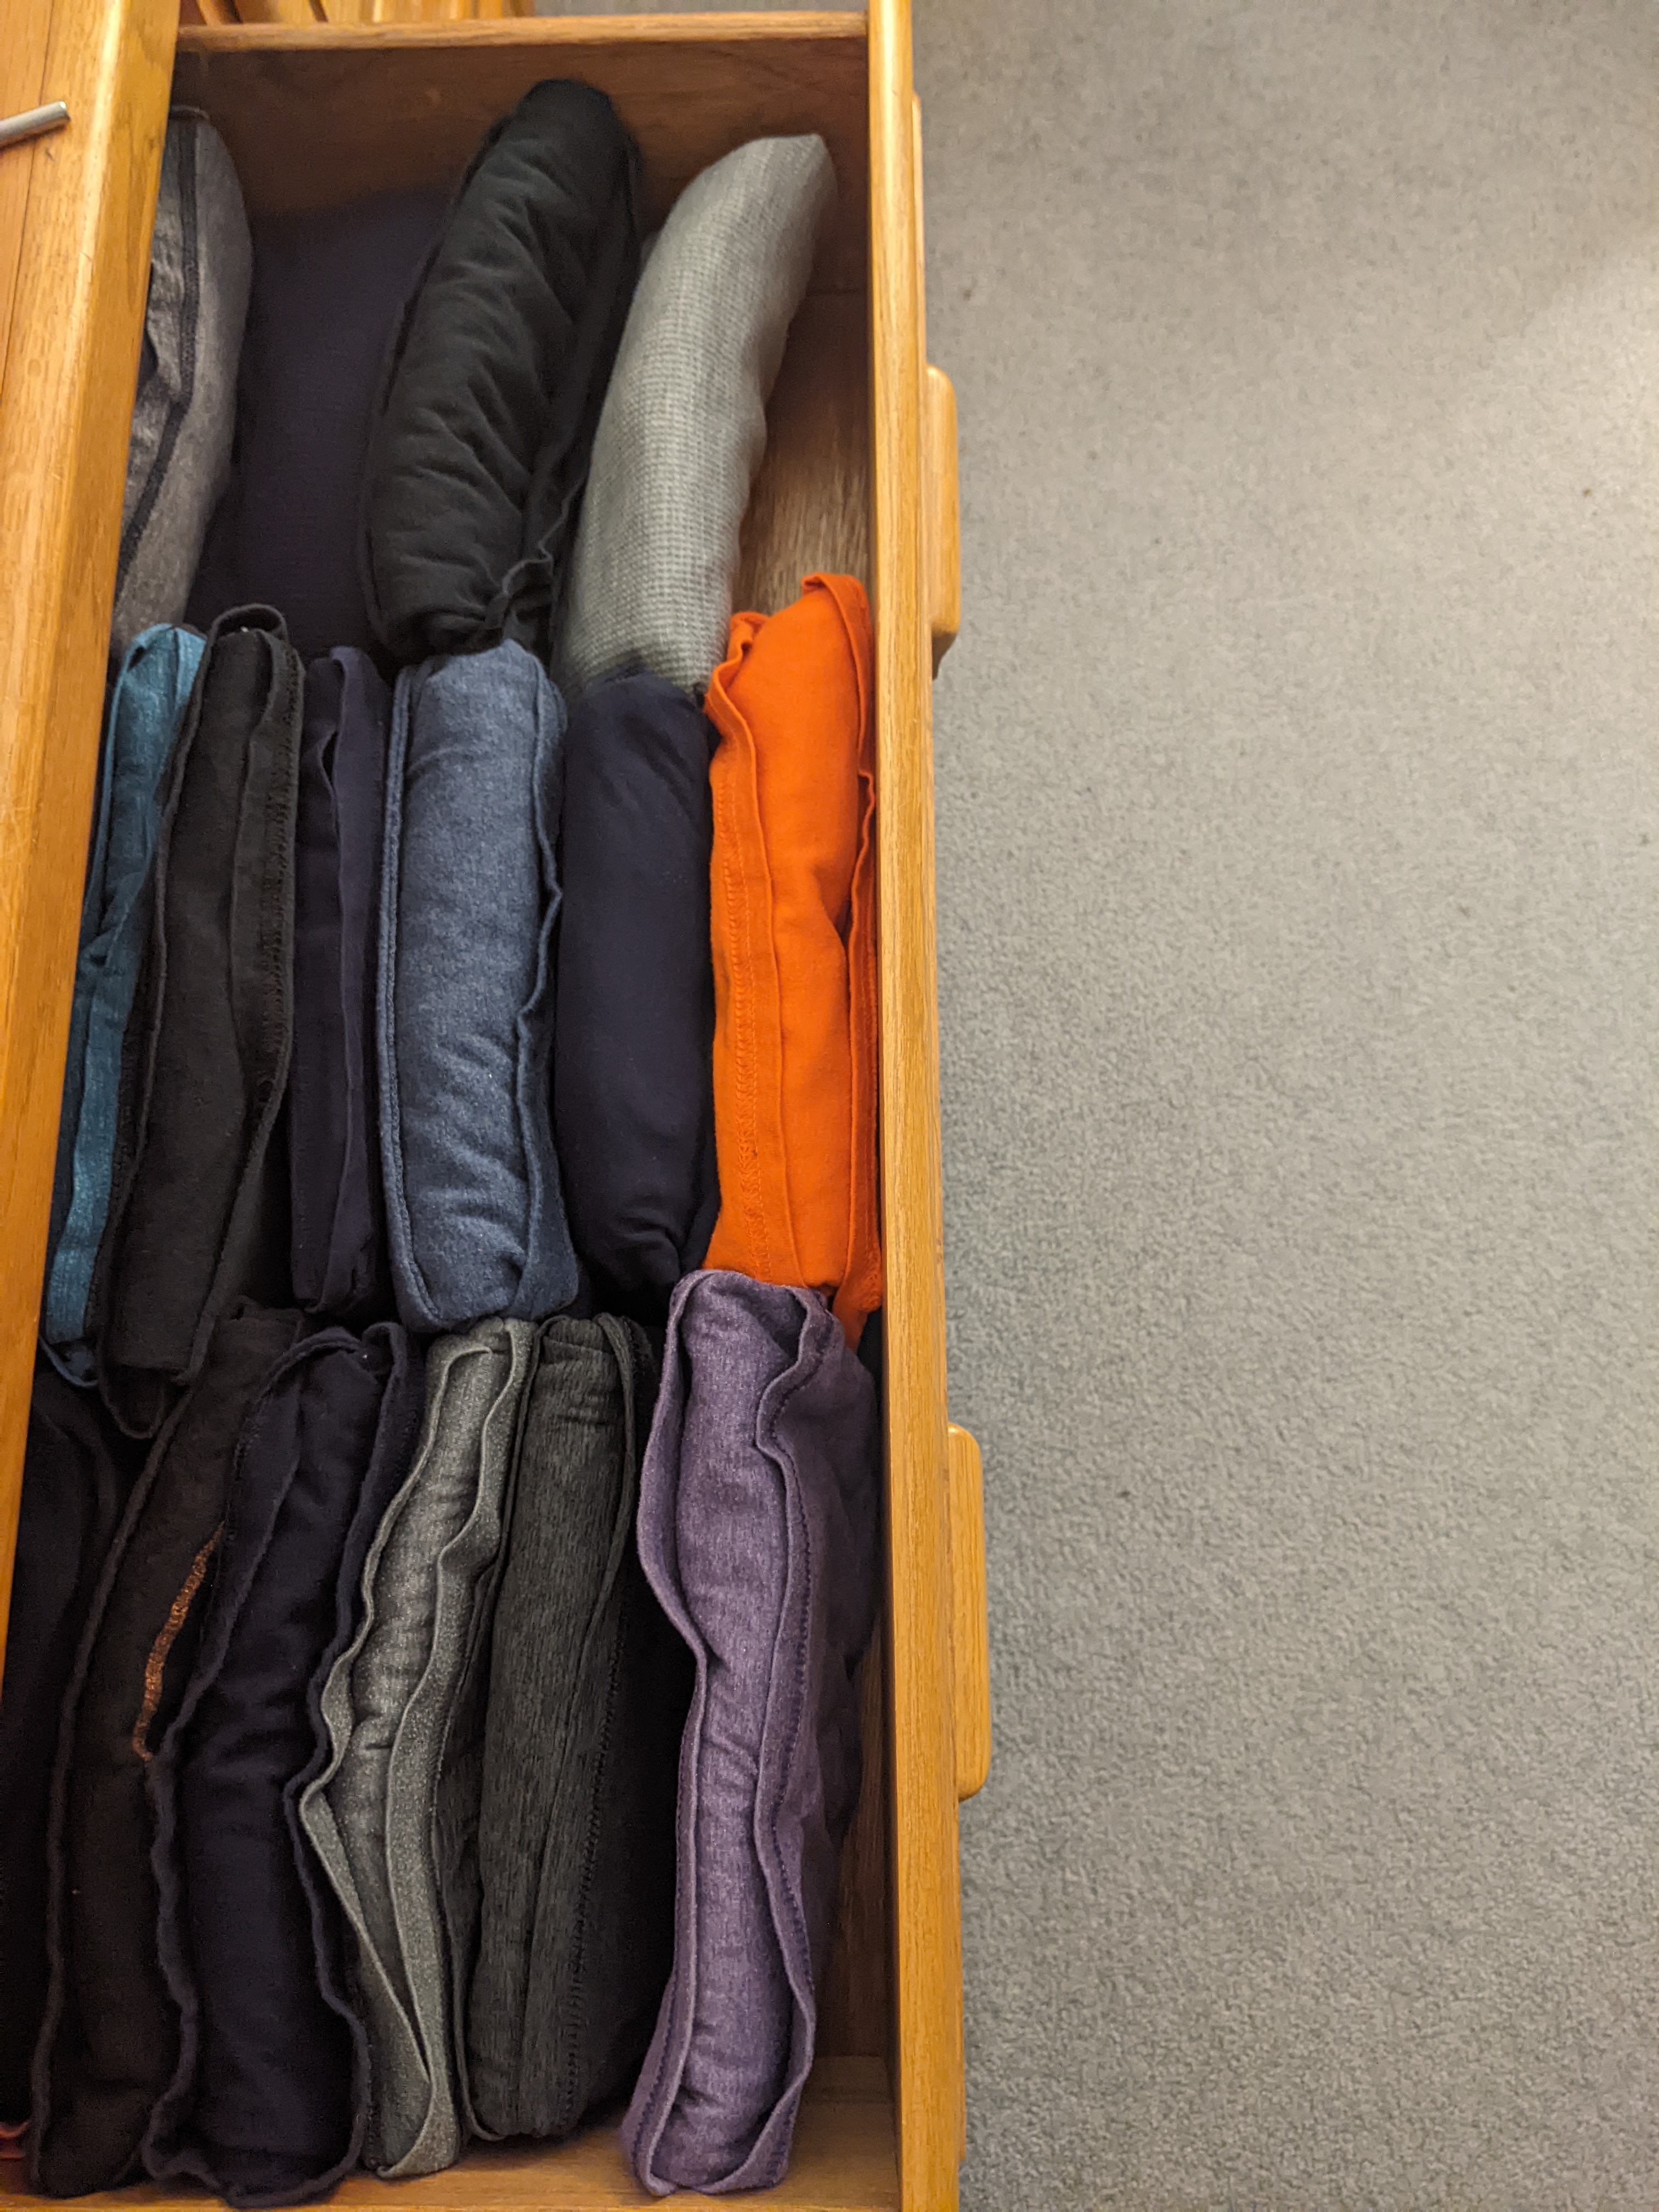
To perform the IRENE folding method, all you need are a few shirts to practice folding with and a flat surface to fold them on. For the most versatile experience, try collecting a few shirts of varying sizes and textures; although the process doesn't change, it's good to get used to working with fabrics of varying elasticity.
Basic Steps
There are five general steps to folding a shirt using the IRENE method. They are listed below, in order from start to finish:
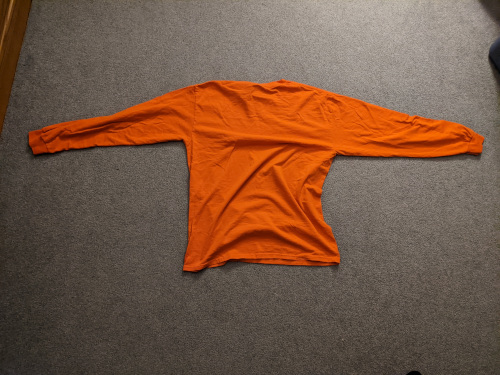
- Smooth the shirt out on a flat surface.
- Tuck the bottom of the shirt underneath the rest.
- Fold the sleeves and shoulders inward.
- Short Sleeves: Fold sleeves and shoulders at the same time.
- Long Sleeves: Fold the sleeves first, then the shoulders.
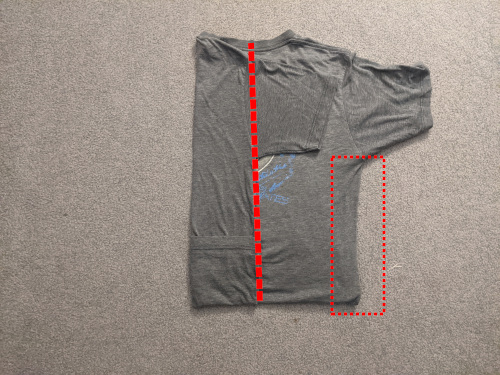
- Fold the shirt in half twice along the longer dimension.
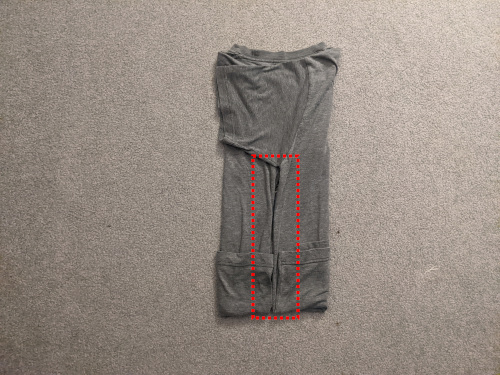
- Wrap the shirt around itself.
We'll start by walking through each step together in a little more detail. When you're ready, press the "Next" button to begin.
Lesson 1 — The Basics
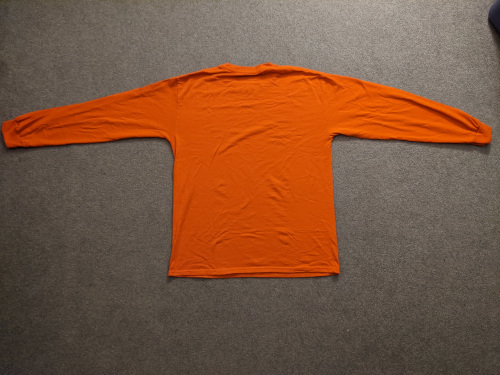
Step 1: Smooth the shirt out on a flat surface.
Lesson 1 — The Basics
Step 2: Tuck the bottom of the shirt underneath the rest.
Lesson 1 — The Basics
Step 3: Fold the sleeves and shoulders inward.
Lesson 1 — The Basics
Step 4: Fold the shirt in half twice along the longer dimension.
Lesson 1 — The Basics
Step 5: Wrap the shirt around itself.
Checkpoint!
What problem does the last step of the procedure (tucking the shirt inside itself) primarily solve? (Hint: You can press the "Go Back" button to review the last step of the procedure)
Lesson 2 — Imagining a Centerline
One of the most important steps in the IRENE process is determining the center-line on which to fold the sleeves and shoulders. We'll start from the beginning again, so grab another shirt or un-fold your finished one from the last lesson before starting.
We'll first begin by laying the shirt out on a smooth, flat surface as usual.
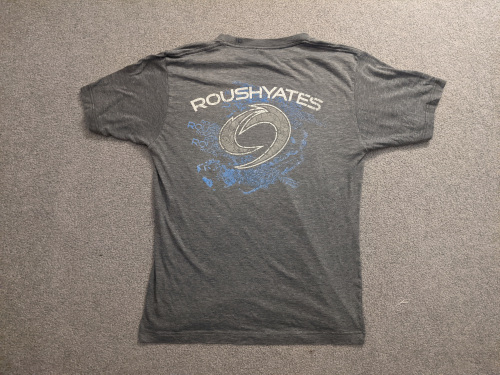
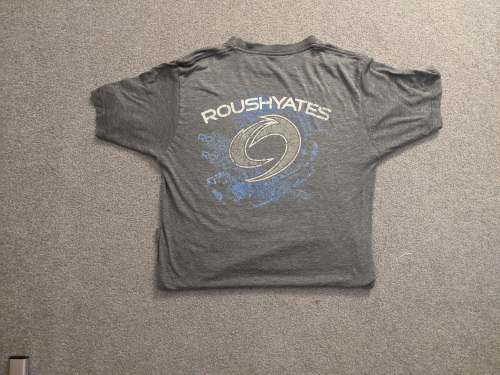
We'll fold the bottom underneath as we did last time. Refer to the image on the right for approximately how much should be folded relative to the total size of the shirt.
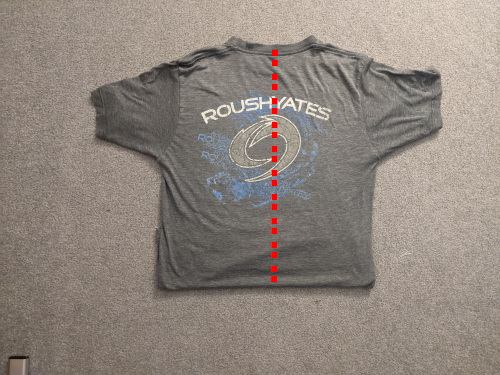
Now for the interesting part: Take a moment and imagine a line running vertically down the center of the shirt, starting at the collar. A dotted line has been included in this image as an example.
Take one outside of the shirt (the part outlined by the red square on the right) and fold it over so that it aligns with the centerline you just identified.
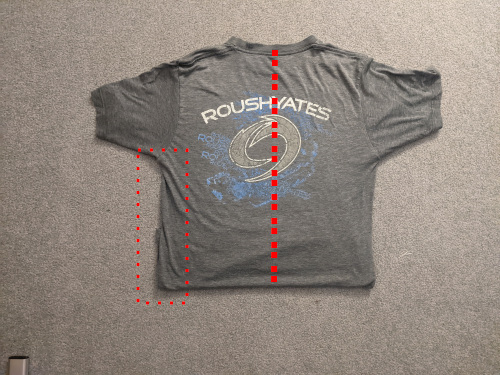
Next, do the same for the other side. Remember, it's okay for the sleeves to overlap, but the outsides of the shirt should meet in the middle.
When you're all done with step 3, your shirt should look something like this. The important part is for the outsides of the shirt to be touching in the middle along your imaginary center line. This is outlined by the square in the image on the right.
Checkpoint!
Following the IRENE method, what should the next step in the process be after finding and folding the shirt along the centerline?
Lesson 3 — Laying a Good Foundation
If you find that you're still not getting the neat result at the end as in the first lesson, it might help to take a step back and make sure you're working with a good foundation.
Below are a few examples of what your shirt might look like in Step 1. We'll use a long-sleeve shirt here just to show how much space might be needed.

Checkpoint!
True or False: The number of wrinkles/folds in the fabric of the shirt at the start of the process influences the neatness of the end result.
Now that you've got a good foundation laid out, try and finish the IRENE process from this point onward. If you get stuck, you can always go back to previous lessons to help.
Once you've got a good foundation laid out by smoothing the larger wrinkles and creases, try and finish the IRENE process from this point onward. If you get stuck, you can always go back to previous lessons to help.
Lesson 4 — Putting It All Together
Now that you're familiar with the finer details of the IRENE method, try folding the shirt on your own.
Remember: In order to pass this module, you'll need to complete the entire folding process in less than 40 seconds. You can use the timer here to help you practice the appropriate pacing. The original steps are also listed for you to help you remember the order in which to perform them.
Basic Steps:
- Smooth the shirt out on a flat surface.
- Tuck the bottom of the shirt underneath the rest.
- Fold the sleeves and shoulders inward.
- Short Sleeves: Fold sleeves and shoulders at the same time.
- Long Sleeves: Fold the sleeves first, then the shoulders.
- Fold the shirt in half twice along the longer dimension.
- Wrap the shirt around itself.
0s000ms
Check Your Work
After completing each practice fold, use the following checklist and image to confirm key criteria of the finished product:
- The process was completed in under 40 seconds
- The shirt is a uniform rectangle
- There are no obvious wrinkles or creases on the outside of the shirt
- When tossed or turned in your hands or dropped on the ground, the shirt does not un-fold itself
Continuing Your Practice
Of course, not all shirts are created equally. To further expand your knowledge of the IRENE method, it might be helpful to try applying the procedure on several different shirts. A couple ideas for practicing on your own include the following:
- Try shirts of varying fabrics, especially ones that are stretchier or thinner than others.
- Look for shirts of various sizes from friends or family members; pay careful attention to how the amount of fabric changes in step 2 (folding the bottom underneath) as the shirt size changes.
- Experiment with sleeveless shirts (Hint: The process is very similar, just without the sleeves)
You may find it helpful to return to the timer/instructions page by clicking the "Go Back" button below. You may also quickly navigate to any one of the major sections in this module by clicking on its name in the left side column. Happy Folding!